80mm Maxflow System Install
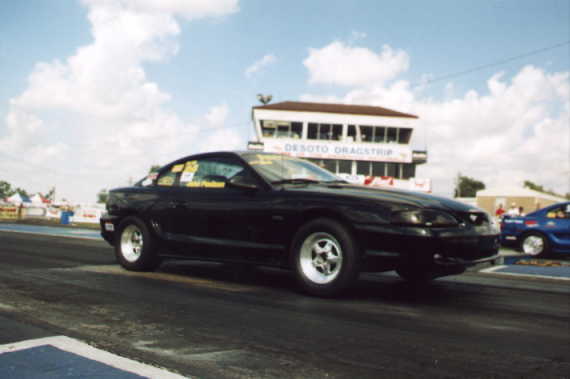

80mm Maxflow System Install
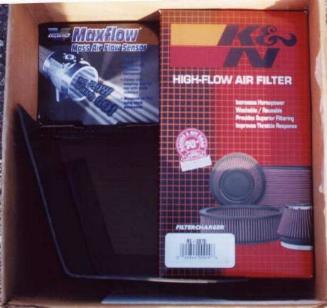
| More flow for more go! This is the first thing I notice when I opened up the carton containing my new 80mm Maxflow System made by C&L Performance Inc. That is of course once I made my way through the popcorn packaging that keeps the unit free of damage during shipping. So I’m thinking to myself, seems like a simple concept, and I can’t wait to try it out. I break out the camera and waste the 5 pictures or so that are left on the roll. I always like to have a fresh new roll of film to take pictures whenever I do something like this. Then the process begins, I make my way out the front door to reveal a mess on my fender. That’s right the same birds that my wife and son like to feed are the same ones that like to make my life a living hell when they do their duty on my black beauty. Anyway, to get to the point, I wash the car up, break out the toolbox, and set myself up for the thrill of installing new parts.
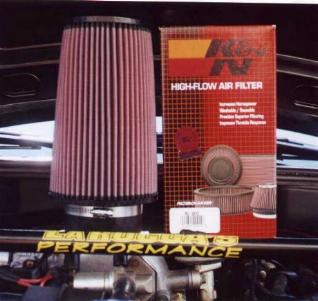
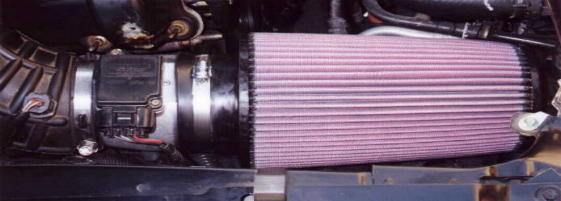
The Maxflow system by C&L comes neatly packaged in three pieces the maf unit, the heatshield, and a rather large cone style K&N filter. Just to be nice they throw in an instruction sheet as well. To install one of these units you will need an adjustable wrench (or a standard 1/4" drive socket set), a 1/4" drive socket wrench with a 1/4" socket for use with the supplied tamper proof torx bit, and a screwdriver. (The instruction sheet says phillips head although on my car I needed a regular blade style, it may vary per vehicle and/or model) I was rather pleased that they supplied you with the tamper proof torx bit as these can be hard to find and are not normally included in a lot of today’s standard tool kits.
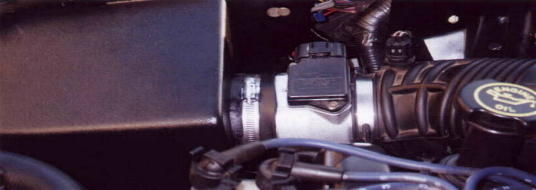
Step number 1, You will need to remove the factory Mass airflow assembly by loosening the clamp on the back of the factory mass airflow unit with a screwdriver then pulling the rubber ducting off the end of it. Next would be to remove the wiring harness that is attached to the factory MAF unit. The thumb and forefinger method is all that is needed to release it from the unit. You must now remove the bolt that attaches the factory airbox to the fender using either a socket or an adjustable wrench. The airbox is now clear for removal by simply pulling it towards the front of the car and lifting it up and out.
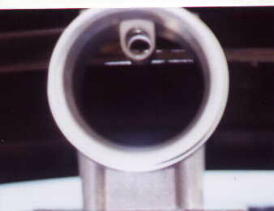
Step number 2, There will be a black box attached to the top of the factory maf unit. This is the electronics and calibration piece. You will now transfer this to the new MAF unit. With a 1/4" drive and the supplied tamper proof torx bit loosen and remove the two screws holding it on to the factory maf unit. Now CAREFULLY lift the unit out of the factory MAF making sure that the sensor clears, and the o-ring comes with the electronics. You must make sure you have the o-ring with the electronics or it will not seal properly on the new MAF unit. Now place the electronics into the new MAF unit and screw it into place using the same screws you took out of the factory unit. Do NOT over tighten these as it can cause the electronics unit to crack and lose it’s weather proof seal. The best way to attach it is to use an alternating fashion on the screws to make sure the electronics are seated properly. Here is some newly found information supplied by Lee Bender over at C&L performance "on some of the 99 and 2000 model vehicles, the electronics are a VERY tight fit on to the top of our housing. This is because of some "swelling" in the plastics mold for the MAF electronics that Ford uses. If this is the case with your vehicle, it is strongly recommended that you take a file and run it around the base of the sensor prong tower where it meets the aluminum part of the electronics. This will allow the electronics to freely drop into the housing without any force needed to be applied to the electronics. This will promote a good seal with the o-ring, and will eliminate the potential for any air leaks due to a poor o-ring seal."
Step number 3, Mount the K&N filter to the new MAF unit. Simply place the rubber end over the maf and tighten the clamp down with the screwdriver. Make sure that the collar of the K&N is completely over the new MAF unit before you tighten the clamp. If for some reason the collar is tight you may need to stretch it a little to fit, but I did not run into any problems with mine whatsoever.
Step number 4, Place the new MAF and filter unit into the rubber factory ducting. Simply tilt the unit into place and slide the factory ducting over the new MAF unit and tighten the clamp with a screwdriver making sure you have a snug fit. Re-install the wiring harness back onto the electronics simply by pushing it into place. Now to finish the job, take the plastic heatshield and secure it to the fender using the factory airbox bolt. There is a groove away from the fender that the shield slides into and it then tilts up and screws back into the fender. The plastic shield should cover the k&n filter and hold both the filter and new MAF into place.
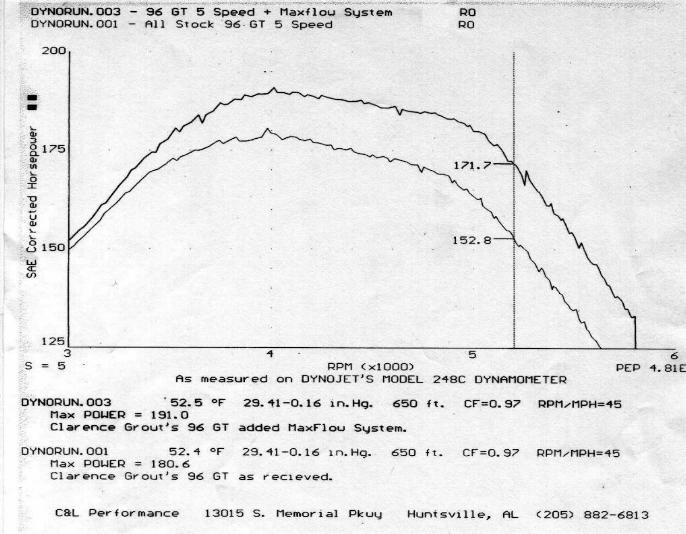
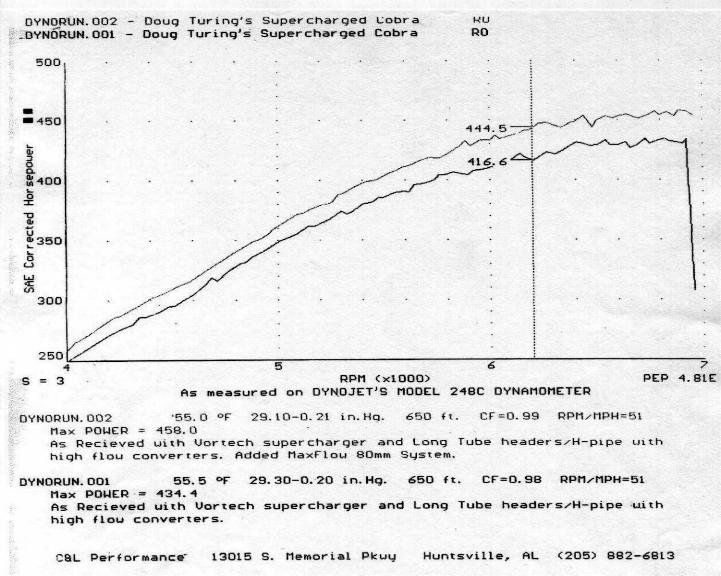
C&L Performance does not recommend the use of cold air or ram air kits along with their unit as they offer no benefits over the Maxflow package. "The use of such products have a tendency to throw off the calibration of the mass airflow meter". Just for kicks I later on threw on my old march ram air scoop and hose to test this out. At around 2000 rpm's in daily driving the car got some major power surges. Some people have claimed that turning the mass air unit on an angle would cause this to stop, but I tried that as well and found it not to be the case. The best way to use the maxflow system that I have found is by using the system the way it is designed to be used. I don't reccomend using it any other way!! *** On a personal note I recommend resetting the computer by disconnecting the battery for 15 minutes then reconnecting it. This allows the EEC to relearn and should maximize the performance gains as it adjusts to the new airflow obtained by installing this product. After resetting the computer I started the car and reprogrammed my radio channels while letting the eec get aquatinted with its new friend. Then is was time to see what kind of gains were to be felt per the big-butt-o-meter (patent pending...NOT!!). After pulling out of my development I had the chance to romp on it quite nicely. I immediately felt that my throttle response was a lot tighter than before the C&L unit was installed. The car had definitely picked up some gains over the various things that I have tried in the past. As far as numbers go, well I can't give you the exact horsepower numbers gained on my car as it has not been dynoed. In my opinion the dyno is just a tool for measuring gains and smoothing out the curves. It is a great tool no doubt, but real results are the ones you feel in everyday driving as well as on the track. I definitely feel a difference with the maxflow system on my car in daily driving as it has much smoother throttle response. Also, on my next track outing after the C&L unit was installed I picked up about .1 in the 1/4 on average. I feel that if I had done the maxflow system from a stock type setup that even greater gains would more than likely be felt. I previously had a Roush Cold-Air kit on the car feeding to the stock non-gutted MAF unit. I have also tried a March Ram-Air kit , a gutted stock MAF, and several other home made methods without any of them coming in comparison to the C&L Maxflow system. After all of my previous experiments I was very skeptic to think that anything would be felt aside from me wanting to feel a difference to justify the effort. This would all change the second I got to rip on the throttle with the C&L system in place. The car pulled more and there was no hesitation when the throttle was floored. Previously the car would feel a very slight hesitation when flooring it almost like a bog. Not anymore!! this was not the case with the Maxflow kit installed as it was a very smooth and steady acceleration process with much improved throttle response. In addition the exhaust note changed tones. It did not however just get louder, as it now has more of a throaty sound especially upon deceleration. This is with the Flowmaster 2 chamber mufflers which are known for their distinct popping sound upon hard deceleration. There was a lot less popping and it does however sound a lot smoother under hard deceleration, which I was very pleased about as well. Overall I think the mod was definitely worth the effort and it will remain on my car. I also like how the car doesn’t get disabled when you need to have the unit recalibrated for new injectors. (which I'll be doing in a few months to add the ati procharger and 30# injectors to the car!!) You simply call C&L and have them send you a new sampling tube for a fee a lot less than sending the whole unit out to be recalibrated like some models on the market. That's a lot better than having to buy two meters just so you have no downtime while the other ones being recalibrated. A lot less of a hit on the wallet too. I know people that have waited up to three months for their maf units from another company to be recalibrated. That's not going to happen with the C&L unit. You call them up send them the money and in little time you've got yourself a new calibration. No downtime because you keep the meter on your car while waiting for the new calibration tube to come in!!! I have also included in this article some dyno charts that were sent to me from C&L showing actual gains on other peoples cars. The amount of RWHP and Torque gained will be different on about every modded vehicle. In addition to the dyno charts there is also some important facts about calibration that were supplied to me by C&L Performance as well. Please take the time to read them as they will give you a better understanding on how these units are calibrated and what calibration really is. If you still need more information and proof that the C&L Maxflow System works you can also check out, Super Ford Oct. 1999 starting on page 90 entitled Air Supply, MMFF February 1998 starting on page 216 entitled Massive Airflow Means More Horsepower, and MMFF January 1999 issue on the Superfly project car. In my opinion the maxflow system is definitely worth the cost from the gains in throttle response alone. Besides who doesn't need an extra .1 off their 1/4 times? I’d like to thank Lee Bender over at C&L Performance for sending S.S.O.T.N. the means to perform these tests. Lee knew up-front that the actual results would be posted weather they were positive or negative. He knows what his products are capable of and had no doubt that they would perform well as they did. He is more than happy to help anyone with questions by either calling him or shooting him an e-mail cbender@hiwaay.net. You can also check out the C&L Performance website by clicking on their logo at the top or bottom of this article. After reading my article Lee sent me this in an e-mail Thank you, John Paulson |
| Back |
2000© SuperStallions Of The Net! All Rights Reserved.
