|
EEC Tuner: Introduction and Installation
Introduction
Back in the day of the 5.0's infancy, one of the popular modifications was 'a chip'. These strange little boxes promised power increases by changing values in the car's electronic engine control (EEC) module. But they were mainly cookie cutter programs specific only to the car model and sometimes the year. The drawbacks to this is that what might work well in one car might not work in another. Not all cars are created equal, and with every modification done to a car it becomes more important to ensure the chip's program is applicable and beneficial to the combination of the vehicle it is being applied to. Auto enthusiasts realized that in order to reap the benefits of a chip, there had to be a way to customize the settings in the program to ensure improved performance.
Vehicles factory equipped with electric cooling fans and/or electronically controlled transmission could also benefit from chips. Shift points and firmness could be altered, and the vehicle could run cooler by turning the fans on earlier, at lower temperatures.
That being said, several companies emerged with more 'custom programming' and many tuners started utilizing their dynos to burn programs. Watching air fuel ratios and comparing hp gains and losses, they were able to dial in a vehicle's eec parameters to provide performance based on the person's specific wants and needs. This worked very well and produced very fast street cars, providing better driveability and more power throughout the powerband. It also produced mega power at the track, with many racers dipping into the 9 second zone with the factory EEC system.
I have been running a JMS programmed Autologic chip in my 1988 Vortech supercharged GT for about 3 years now, and it has provided a safe tune, very good driveability and proven track performance. Current best is 11.40@122.02 with a 1.72 60ft. Vehicle race weight is approximately 3500# with driver and car has all smog equipment and is emissions legal. Vehicle is driven to and from the track, sometimes as much as 4 hours, so a safe tune on pump gas is very much preferred.
In those 3 years, I have changed/upgraded my combo a few times and each time I had to send the EPROMs back to be reprogrammed for the combo changes. Whether you want changes in timing, injector size or fuel tables, there was little you could do by yourself. Those who are fortunate to have a chip burned during a dyno session could maximize the settings and check the results of each change. Those of us (me included) purchasing a chip mail order had to see if the chip worked by either seat of the pants, or a seperate dyno session. Nevertheless, a reburn was necessary when making an dramatic changes to the powerplant.
Enter the EEC Tuner. Essentially a reprogrammable chip, the EEC Tuner allows the user to modify the values within the stock EEC using either a DOS program or a more user friendly Windows version. Users are able to make changes almost instantly to their car's computer, eliminate the need for costly reburns. This article will detail the installation, configuration and results of the EEC Tuner.
What you get
The tuner arrives in a small appropriately labeled white box containing everything you need.

Included is:
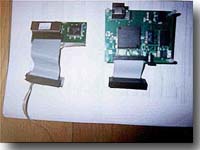
| EEC Tuner Board |
This is the actual EEC tuner itself which will plug into the J3 port on the EEC module |
| EEC Tuner software |
To be loaded into your desktop/laptop PC. Supplied on 3.5" disk |
| DC Power Adapter |
Used to power your EEC tuner for use when not connected to the car's EEC |
| EEC Tuner RJ45 to 9pin modular cable |
Connects EEC Tuner board to desktop or laptop PC via serial port |
| Edge Guard Strip (for early processors) |
Protects EEC Tuner J3 connector strip from contacting EEC cover |
| Instruction Booklet |
Documentation and release notes |
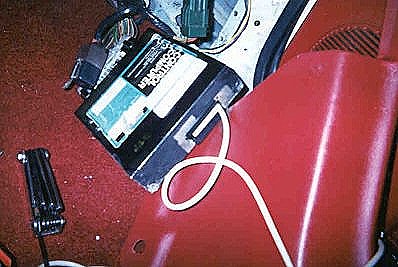
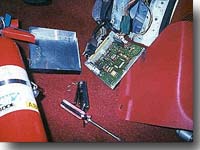
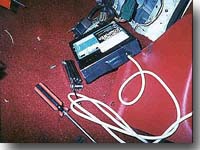
Comparatively, the EEC tuner itself is only slightly larger than the Autologic chip and harness I am replacing it with:
Installation
Those of you who have installed a chip in your Ford will find much of the eec tuner installation familiar. The tuner board itself plugs into the J3 test port of the EEC. Usually you will find an adhesive cover over it, remove if so equipped.
Board installation can be performed with the EEC in the car, but for first timers, I would recommend pulling the EEC out.
Begin by removing the passenger side kick panel. This is accomplished by removing the front most screw on the door sill plate and the plastic push pin on the lower part where the passenger's feet would rest.
Remove the plastic trim cover and you will see the EEC harness.
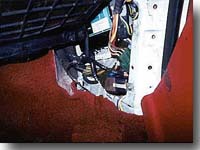
On my car, I had to remove one bolt which retains part of the harness to the body of the car. If your computer has never been out, you will see a white plastic retaining clip inside on the right that holds the eec to the inner fender. Remove the retaining bolt and the eec should slide out. It may take some wiggling, be patient and try not to damage anything.
If you would like to remove the EEC from the vehicle, loosen the bolt head on the top of the EEC where the 60pin connector meets the EEC module. A 10mm socket will work fine for this. Keep in mind the bolt will not come out of the harness, rather when it has disengaged itself from the EEC module it will freewheel. Simply pull the EEC from the 60pin connector. I opted to leave the EEC connected to the vehicle.
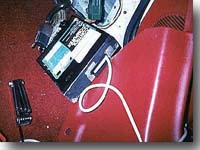
At this point it is necessary to remove the cover from the EEC module. There are four torx retaining screws on the top center and two more at the rear corners. Once these are out, you can remove the cover.
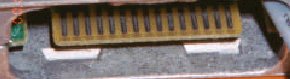
At the service port we spoke of earlier you will see a flat board which mates to the J3 connector on the end of the EEC Tuner board. If you have never before opened your EEC up, you will no doubt see a film over the contacts. It is imperative that you clean these contacts. If there isn't good contact in this area, you wil have problems using the tuner. Super fine sandpaper and/or spray electronics cleaner work very well for this.
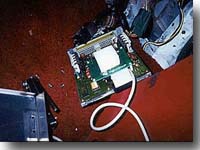
Insert the J3 connector from the EEC Tuner onto the part of the board that is behind the service port. The cover should still be off at this point. Lay the EEC tuner down onto the vehicle EEC's circuit board. The tuner is supplied with four extension "legs" which help insulate it from the vehicles EEC underneath. The instructions say that you may trim these to account for components on the vehicle's EEC board. I had to trim one leg about 1/8th inch. On top you will find a foam pad for the same purpose. The RJ45 ended cable is premade with a 180^ bend to facilitate install inside the EEC module. Route this lead out of the EEC Module through the service port to the right of the J3 connector
Now we are ready to reinstall the cover. Push the Edge Guard Strip onto the service port area on the cover. This protects the EEC Tuner ribbon cord from fontacting the cover body. As you push the cover down, you wil feel resistance from the foam padding underneath. This is normal. Reinstall the four torx screws on top, and the two on the side near the service port.
Cover the area with electrical tape as shown.
Reinstall the EEC module onto the 60pin connector from the vehicle's harness (if it was removed). Taking great care not to pinch or kink the serial connector coming out of the EEC module, replace the EEC into the inner fender. Replace the kick panel trim.
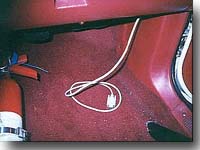
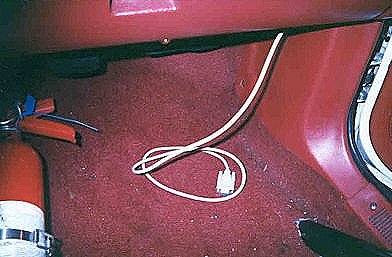
I opted to route the serial cable behind the glovebox and sip tie for a clean and safe appearance. The serial cable will run behind that and come out on the passenger side of the center console. This makes it easy enough for quick laptop hookup and easy to keep out of the way.
 
Turn the key to on but don't start the car. The fuel pump should energize for a few seconds then shut off. If the pump continues to run there is a problem with the tuner and board connection, most likely you didn't clean the areas well enough. Remove EEC, clean and try again.
The tuner is now installed and ready for use.
PC Requirements
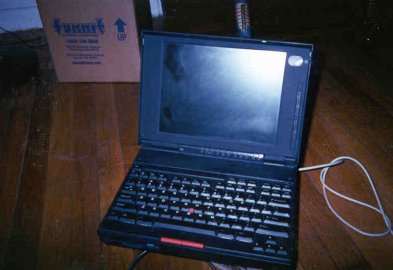
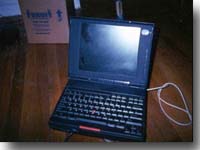
Pretty much any pc or laptop can run the eec tuner software. There is both a DOS and windows version. I am running the 32 bit EEC Tuner software on an IBM 486-25 thinkpad 20MB RAM running Win98. The software is not memory intensive and thusfar has had zero problems.
Software Installation
Installation of the software is as easy as inserting the supplied diskette and running the "a:/setup.exe" from the start menu. If you would like to take a look at the latest EEC-Tuner software, you can download V2.05 here
Once you have successfully installed the software, plug the serial cable from the eec tuner to any available serial port on your desktop/laptop and you are ready to tune.
Note: The default port for the eec tuner in the software is COM1. If you wish to use a different port, simply edit the 'EECTuner.ini' file and change the port here:
[EEC Tuner]
PORT=COM1
For technical questions regarding the EEC-Tuner or any kind of tuner, click here.
Stay Tuned for Part Two: What do those values mean and how do I change them?
Source
Shiftmaster Enterprises
http://www.eec-tuner.com
PO Box 404
Hudson, MA 01749
sales@eec-tuner.com
978-568-1496
|